Key Takeaways
- Fly making (also called fly tying) is the craft of building your own flies to match insects, baitfish, and local forage—directly improving your success on the water by letting you respond to what fish actually eat.
- Understanding the core components—hooks, thread, feathers, fur, and synthetics—gives you control over buoyancy, movement, durability, and realism in every pattern you create.
- Choosing the right fly patterns depends on your target species, season, water type, and hatch activity; regional tweaks based on local observation often outperform generic store-bought options.
- The learning curve starts with forgiving patterns like the woolly bugger and zebra midge, progressing to advanced dry flies and streamers as you develop thread control, proportion, and material handling.
- Beyond catching more fish, fly making deepens your connection to entomology, ecosystems, and the waters you love—turning every trip into both a learning opportunity and a more personal experience.
What Is Fly Making and Why It Matters
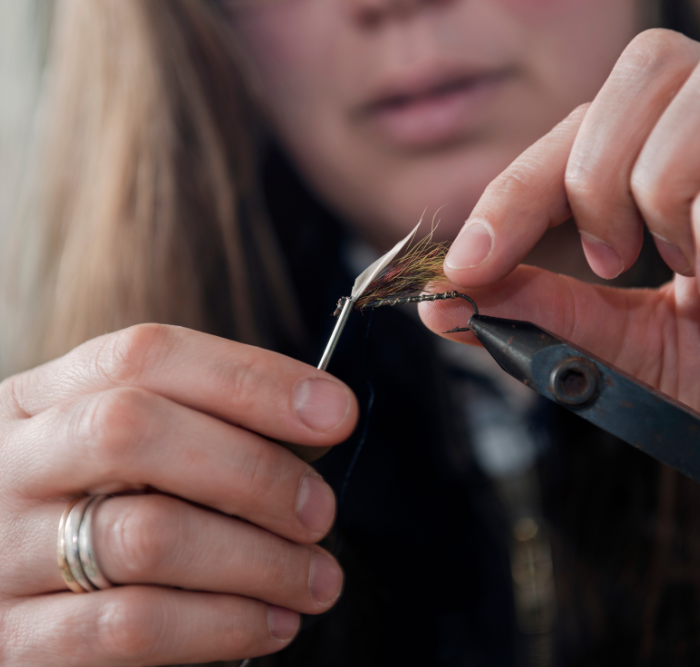
Fly making is the hands-on process of attaching natural and synthetic materials to a hook to create artificial lures that imitate the insects, baitfish, crayfish, and other organisms that fish eat. For any serious fly fisherman, this craft sits at the heart of the sport—transforming raw materials into functional art that can fool selective trout, aggressive bass, or wary saltwater species.
Unlike grabbing a pre-tied fly from a bin at your local shop, tying flies yourself forces you to study what fish actually consume. When you sit down to tie a size 16 Blue Winged Olive nymph for an April hatch on your home freestone stream, you’re not just wrapping thread around a hook. You’re synthesizing everything you’ve observed: the size of naturals tumbling in the drift, the olive-brown coloration of the nymphs clinging to rocks, the depth where trout are holding. That same thinking applies whether you’re building baitfish streamers for October striped bass or foam beetle patterns for summer bluegill.
This feedback loop between the vise and the water is what separates competent anglers from truly effective ones. When a trout refuses your pheasant tail nymph three times in a row, you gain information. Was the body too bulky? The tail too long? The bead too bright? Your next session at the vise becomes a problem-solving exercise informed by real refusals and successful takes. Over time, this cycle sharpens your eye for detail and your instincts on the water.
Fly making blends science and art in equal measure. You’re balancing realism—matching the silhouette, color, and size of natural fish food—with trigger points that provoke strikes, like a flash of tinsel or the pulse of rubber legs. You’re weighing durability against lifelike movement, theory against on-water testing. It’s a craft that rewards patience, observation, and the willingness to experiment. And when a fish finally eats a fly you designed, tied, and presented yourself, the satisfaction runs deeper than any store-bought pattern could provide.
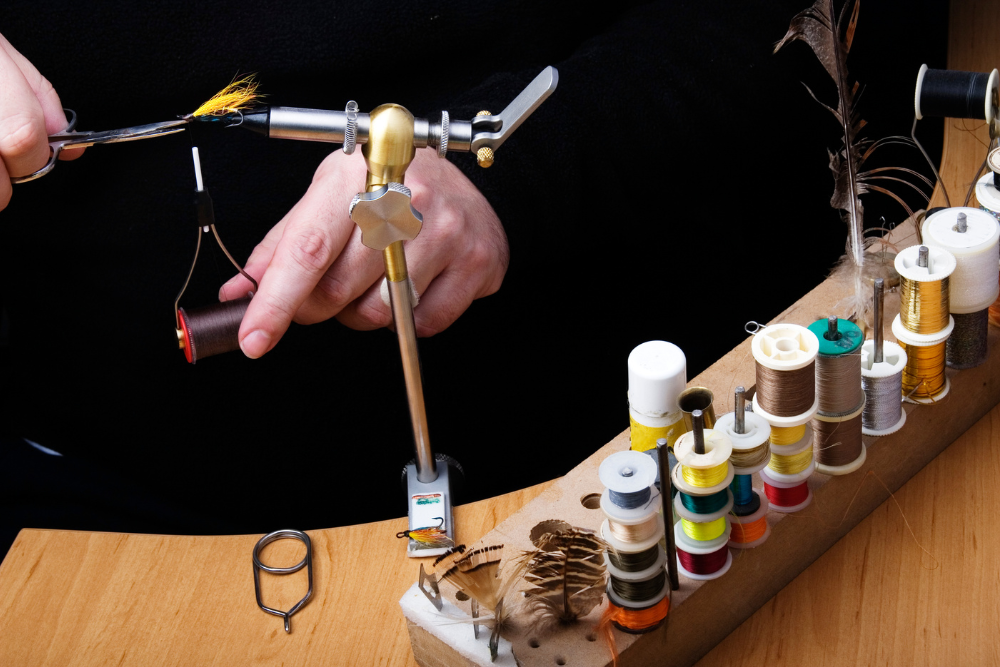
Core Components of a Fly: Hooks, Thread, and Materials
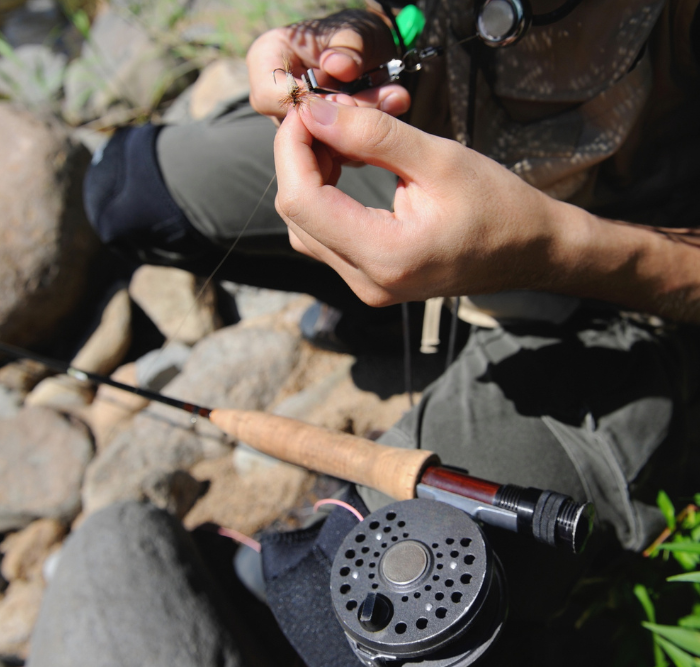
Every fly begins with raw materials, and understanding what each component does is the fastest path to tying patterns that actually perform. The materials you choose determine how deep your fly sinks, how it moves in current, what silhouette fish see, and how many toothy strikes it survives.
Hooks: The Foundation
The hook is where everything starts. Hook size and style must match your target species and the prey you’re imitating:
| Application | Hook Size | Style |
|---|---|---|
| Tailwater trout nymphs | 16–20 | 1XL or 2XL nymph hooks |
| Freestone stonefly nymphs | 6–10 | 3XL or 4XL |
| Trout streamers | 4–8 | 4XL streamer hooks |
| Saltwater fly (redfish, stripers) | 1/0–2/0 | Stainless, strong wire |
| Small dry flies | 14–22 | Standard dry fly wire |
The hook eye matters too—straight eyes for most nymphs and dries, down-eyes for some wet flies and streamers. Many tiers mark weighted hooks with a red marker on the hook eye to identify them quickly in the box.
Thread: Control and Security
Thread holds everything together. A 6/0 or 140-denier thread works for most trout flies, providing enough strength without adding bulk on smaller hooks. For big deer-hair bass bugs or large streamers, step up to 3/0 or heavier. Thread color should complement the body—olive thread under olive dubbing, black under dark patterns.
Your thread bobbin controls tension. Too loose, and materials slip; too tight, and you break the thread or crowd the head. The whip finish—running your tag end under 3 to 6 tight wraps—locks everything in place, followed by a drop of head cement for durability.
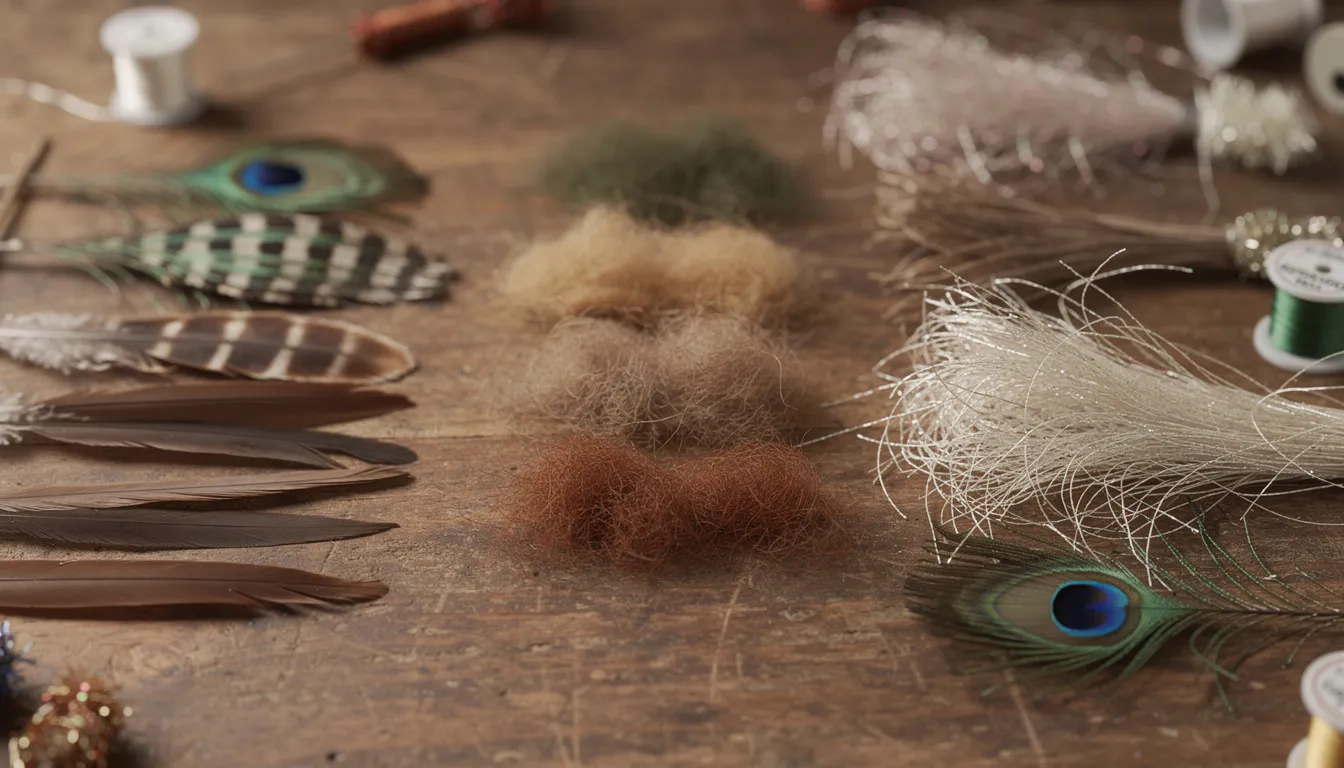
Natural Materials
Natural tying materials bring organic movement and texture that synthetics often struggle to match:
- Hackle feathers: Provide legs and flotation on dry flies; saddle hackle offers long feathers ideal for palmering bodies
- Marabou: Breathes and pulses in water, perfect for streamer tails and wings
- Deer and elk hair: Hollow fibers trap air for buoyancy; essential for Elk Hair Caddis and bass poppers
- Rabbit strips: Undulate seductively on streamers, triggering aggressive strikes
- Peacock herl: Iridescent body material with natural buggy appearance
- Dubbing: Blended fur and synthetic fibers wrapped onto thread for textured bodies
Synthetic Materials
Synthetics expand your options dramatically and often add durability:
- Flash materials: Tinsel, Flashabou, and Krystal Flash add sparkle that mimics baitfish scales
- Rubber legs: Create kick and movement on nymphs and terrestrials
- Foam: Provides unsinkable buoyancy for hoppers, beetles, and surface flies
- Beads: Tungsten (dense, fast-sinking), brass, or nickel add weight and serve as hot spots
- Wire: Lead wire or non-toxic alternatives wrap the hook shank for added sink rate
- Synthetic dubbing: More consistent than natural fur, available in UV-enhanced colors
- EP fibers: Durable synthetic material for baitfish patterns and saltwater fly tying
Color and Translucency
Color choice depends on conditions and selectivity. In clear water with pressured trout, subtle natural tones—olive, tan, gray, rust—often outperform bright attractors. But in stained water or when fishing streamers for aggressive species, bold colors and flash trigger reaction strikes. Translucent materials like CDC or sparse dubbings let light pass through, creating realistic profiles in the surface film.
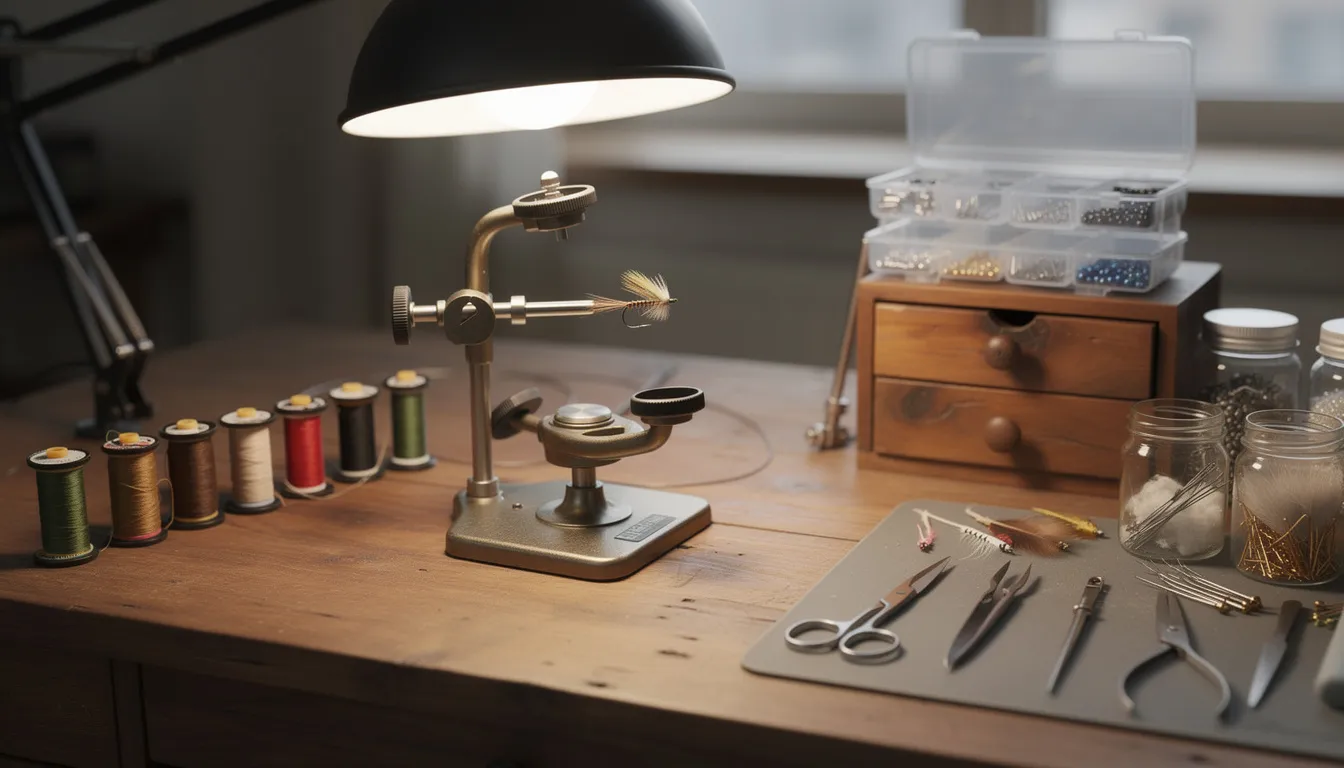
Essential Tools for Effective Fly Making
A handful of quality fly-tying tools beats a cluttered drawer of cheap gear every time. Good tools improve precision, reduce frustration, and make longer tying sessions comfortable rather than tedious. Loon Outdoors is a reputable brand for essential fly tying tools and materials, offering reliable options suitable for both beginners and experienced tiers.
The Vise: Your Most Important Investment
Your vise holds the hook steady while you work. Look for:
- Solid jaw grip: Hooks shouldn’t slip or rotate under thread tension
- Adjustable jaws: Accommodate hooks from size 22 midges to 2/0 streamers
- Rotation capability: Rotary vises let you spin the fly for even thread wraps and inspection
Entry-level vises in the $50–100 range work fine for beginners focusing on trout flies and basic warmwater patterns. Mid-range options ($150–300) offer smoother rotation and better jaw systems for tiers planning to tie everything from tiny dry flies to large saltwater patterns.
Bobbins and Thread Control
The thread bobbin dispenses thread under consistent tension. Ceramic or flared-tube inserts reduce thread breakage—especially important when making tight wraps on smaller hooks or working with fine 8/0 thread. Multiple bobbins let you keep different thread colors ready without constantly re-threading.
Cutting and Gripping Tools
| Tool | Purpose | When It’s Critical |
|---|---|---|
| Fine-tip scissors | Precision cuts close to the hook | Trimming hackle, dubbing, tail feathers |
| Heavy scissors | Cutting wire, thick materials | Lead wire, deer hair, tough synthetics |
| Hackle pliers | Gripping and wrapping feathers | Palmering hackle, collar wraps |
| Bodkin/needle | Applying cement, picking out dubbing | Head cement application, freeing trapped fibers |
| Whip finisher | Creating secure finishing knots | Every fly you tie |
| Hair stacker | Aligning hair tips evenly | Elk Hair Caddis, Comparaduns, hair-wing patterns |
Optional but Useful Extras
- Adjustable lamp: Good lighting prevents eye strain and reveals thread wraps clearly
- Magnifier: Essential for tiers working on size 18 and smaller
- Silicone bead mat: Keeps beads, hooks, and small parts from rolling away
- Waste basket: Attach it to your desk edge to catch trimmings
Avoid the “Everything Included” Trap
Starter kits packed with tons of cheap tools and random materials often disappoint. The scissors dull quickly, the vise slips, and half the materials don’t match what you actually fish. Instead, build a focused shopping list: a solid vise, one good bobbin, quality scissors, hackle pliers, a whip finisher, and materials for 3–4 patterns you’ll actually use. Add tools as your skills and pattern repertoire expand.
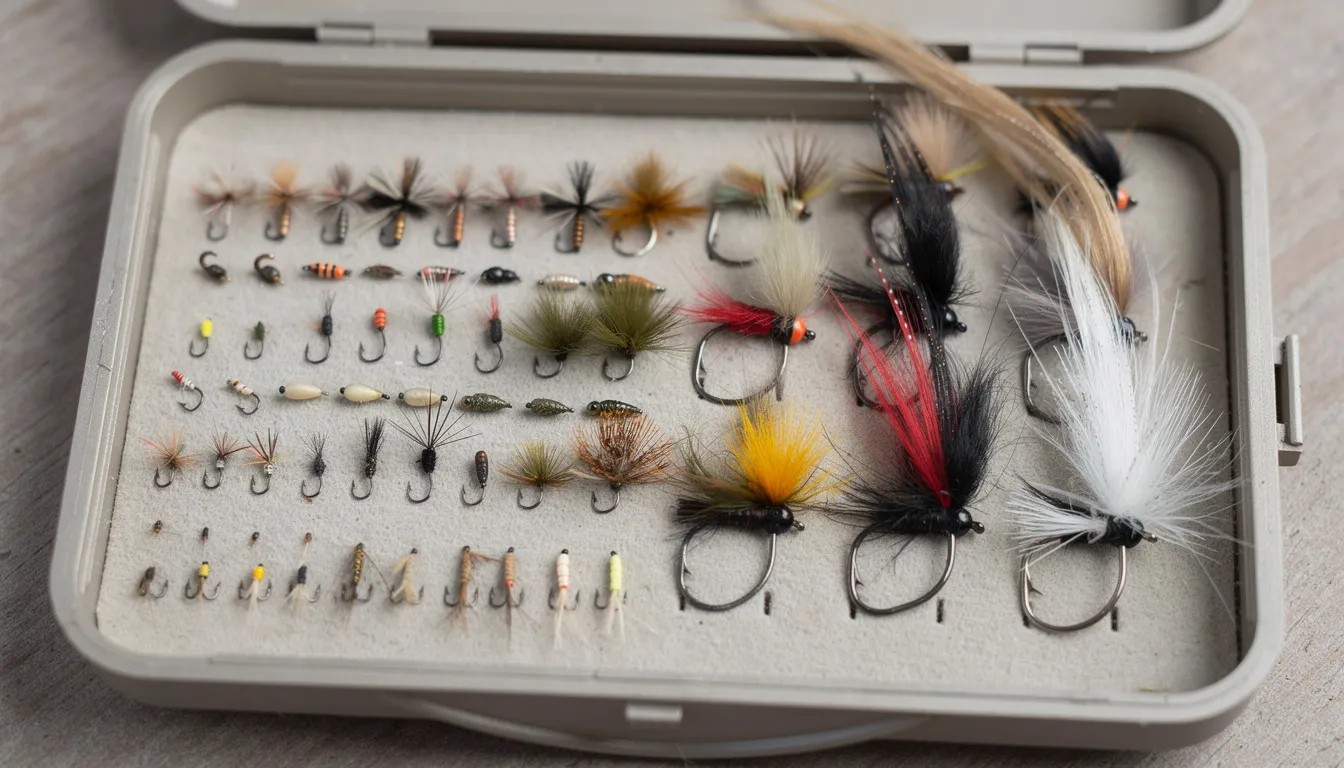
Main Categories of Flies and When to Use Them
Most fly boxes revolve around four pillars: dry flies, nymphs, streamers, and wet flies. Understanding what each category does—and when it shines—helps you build a functional lineup rather than a random collection.
Dry Flies: Riding the Surface
Dry flies float on or in the surface film, imitating adult insects during hatches. They rely on buoyant materials like hackle feathers, elk hair, foam, and CDC to stay afloat. If you want to learn more, consider fly fishing classes for hands-on instruction.
Classic examples:
- Elk Hair Caddis
- Parachute Adams
- Foam beetle and grasshopper patterns
- Stimulator (attractor/stonefly)
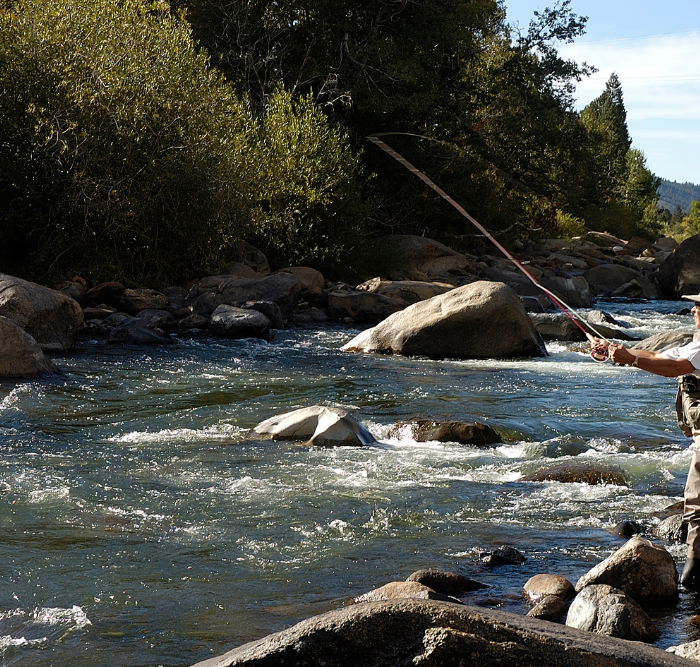
When to fish them: Visible surface activity—rising fish, hatching insects, or terrestrials falling onto the water. Spring and summer evenings on calm pools and runs are prime dry fly time. Nothing in fly fishing matches watching a trout sip your dry fly off the surface.
Nymphs: Where Fish Feed Most
Trout and other species feed subsurface roughly 90% of the time. Nymphs imitate the immature stages of aquatic insects—mayflies, caddis, stoneflies, and midges—drifting along the bottom or rising toward the surface.
Classic examples:
- Pheasant tail nymph
- Hare’s Ear
- Zebra midge
- Pat’s Rubber Legs (stonefly)
- Perdigon (Euro-style)
When to fish them: Year-round, especially in riffles, runs, and deeper pools. Weighted nymphs with tungsten beads excel in fast water. During winter months or when no hatch is visible, nymphs consistently catch fish when other flies fail.
Streamers: Big Flies for Big Fish
Streamers imitate baitfish, leeches, crayfish, and other substantial prey. They’re typically larger, often weighted, and designed to create movement that triggers predatory strikes.
Classic examples:
- Woolly bugger (the universal streamer)
- Clouser Minnow
- Articulated trout streamers (Circus Peanut, Dungeons)
- Zonker
When to fish them: Low-light conditions, stained water, high flows, or whenever you’re targeting aggressive fish. Streamers excel for pre-spawn brown trout in fall, largemouth bass in summer, and striped bass in coastal waters. When standard approaches fail, stripping a streamer through a run often produces the biggest fish of the day.
Wet Flies and Soft Hackles
Wet flies bridge the gap between nymphs and dries. Fished subsurface with soft, flowing hackle that pulses in current, they imitate emerging insects or drowned adults.
Classic examples:
- Partridge and Orange
- Leisenring Lift patterns
- Traditional winged wets
When to fish them: During emergences when fish are feeding just below the surface, or as searching patterns when you’re not sure what’s happening. The swing-and-lift technique with soft hackles can be devastatingly effective on educated trout.
Matching Species, Seasons, and Local Water with the Right Patterns
Great fly making starts with knowing your target species, understanding seasonal changes, and studying the specific waters you fish. Generic patterns work sometimes, but flies tailored to local conditions catch more fish consistently.
Species-Based Thinking
Different species respond to different fly patterns based on their primary forage:
| Species | Primary Forage | Pattern Focus |
|---|---|---|
| Trout (western freestones) | PMDs, caddis, stoneflies | Match-the-hatch dries and nymphs |
| Trout (eastern limestone) | Sulphurs, tricos, midges | Smaller, more precise patterns |
| Smallmouth bass | Crayfish, baitfish, hellgrammites | Clousers, crayfish patterns, poppers |
| Largemouth bass | Bluegill, frogs, large insects | Big streamers, frog patterns, foam bugs |
| Striped bass (saltwater) | Bunker, shrimp, sand eels | Deceivers, Clousers, EP baitfish |
| Bonefish | Shrimp, crabs, small fish | Gotchas, Crazy Charlies, crab patterns |
Seasonal Shifts
The annual calendar dictates what fish eat and what you should tie:
- Early spring (March–April): Midges and Blue Winged Olive nymphs dominate; tie sizes 18–22 in olive and gray
- Late spring (May–June): Caddis emergences and stonefly hatches; larger dries and nymphs in tan, olive, and golden brown
- Summer (July–August): Terrestrials peak—grasshoppers, ants, foam beetle patterns; also pale morning duns on tailwaters
- Fall (September–October): Baitfish patterns for pre-spawn browns and bass; streamers in white, olive, and sculpin colors
- Winter (November–February): Midges and small nymphs; slow presentations with zebra midges and tiny Pheasant Tails
Water Type Considerations
The character of your water suggests specific approaches:
- Tailwaters: Consistent flows support dense midge and mayfly populations; smaller hooks, precise imitations
- Freestone rivers: Variable conditions; broader pattern selection, more attractors, stonefly nymphs
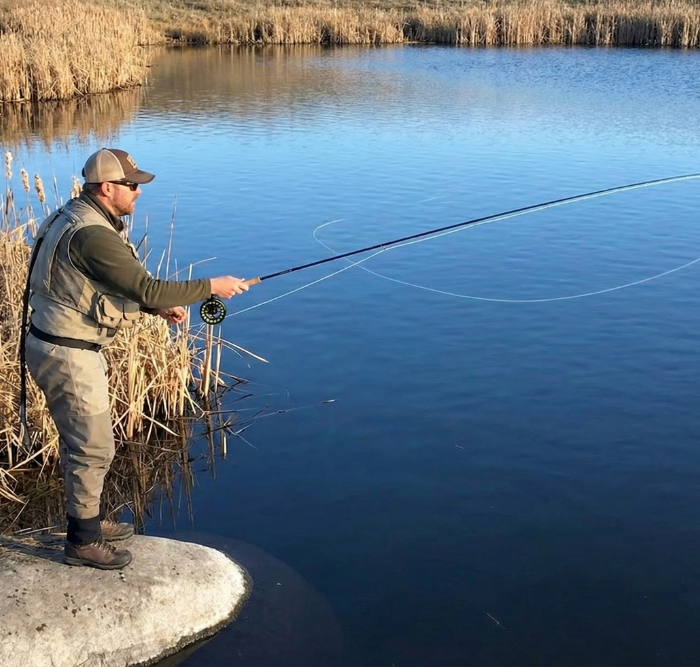
- Stillwaters: Chironomids, damselflies, leeches; unweighted or lightly weighted patterns fished slow
- Saltwater flats: Shrimp, crabs, and baitfish; lead eyes or bead chain for proper sink rate
Reading the Hatch
Before tying specific patterns, study what’s actually in the water:
- Flip rocks and examine nymphs clinging to the undersides
- Use a small aquarium net to capture drifting insects
- Compare naturals to your fly box—note size, color, and profile differences
- Adjust your next ties based on what you find
Regional Variations
Fly patterns often have regional DNA. Euro-style nymphs with heavy tungsten beads dominate competition fishing in European rivers and have spread to American tailwaters. Western anglers tie large attractor dries like Stimulators and Royal Wulffs for aggressive cutthroat. East Coast tiers focus on precise mayfly imitations for educated trout fishing. Local patterns built around endemic insects—like the Pale Morning Dun variations in the Rockies or the White Fly on Pennsylvania limestoners—often outperform generic alternatives.
The Learning Curve: From Simple Patterns to Advanced Fly Making
Let’s be straight: your first fly will look rough. Your first dozen will probably fall apart, have crowded heads, or feature proportions that would make Charlie Craven wince. That’s fine. Every experienced tier started exactly where you are, and progress comes from repetition and deliberate practice.
A Suggested Progression for Beginners
Start with forgiving patterns where imperfection still catches fish:
Phase 1: Foundation Patterns
- Woolly bugger (teaches tail, body, hackle, and weight)
- San Juan Worm (thread control and simple body)
- Zebra midge (small hook handling, wire ribbing, beads)
Phase 2: Building Complexity
- Hare’s Ear nymph (dubbing, ribbing, wing cases)
- Pheasant tail nymph (tail feathers, wire bodies, proportions)
- Simple soft hackle (collar techniques)
Phase 3: Dry Fly Basics
- Elk Hair Caddis (hair stacking, wings, palmered hackle)
- Parachute Adams (posting, parachute hackle, tail)
- Foam beetle or simple terrestrial
Phase 4: Advanced Work
- Spinning and stacking deer hair for bass bugs
- Complex wing techniques (spent wings, CDC wings)
- Articulated streamers with multiple hook shanks
Key Skill Milestones
As you progress, focus on these fundamentals:
- Thread tension control: Consistent pressure prevents bulk and keeps materials secure
- Even body tapers: Smooth transitions from bend to thorax
- Secure materials: Nothing should pull loose under fish pressure
- Proportion: Head, thorax, and abdomen should relate correctly to hook size
- Clean heads: Leave room behind the hook eye; crowded heads are a beginner’s tell
Structured Practice
A complete beginner should resist the urge to tie 50 different fly patterns. Instead:
- Pick one pattern (start with the woolly bugger)
- Tie 10–20 of the same fly, varying only color or size
- Fish them aggressively—lost flies are practice opportunities
- Note what worked and what fell apart
- Tie the next batch with those lessons in mind
Set goals tied to your fishing calendar. If Blue Winged Olives hatch on your home water in mid-April, aim to have a whole box of size 16–20 BWO nymphs and emergers tied by then.
Common Frustrations (and Reassurance)
Every tier faces these challenges:
- Crowded hook eyes: Leave more room than you think; the head takes less thread than beginners expect
- Bulky heads: Use fewer thread wraps and tighter tension
- Loose materials: More wraps isn’t the answer—better tension and locking techniques are
- Uneven hackle: Use hackle pliers and consistent spacing
These frustrations fade with mileage. A year from now, you’ll look back at your first fly and laugh—then tie the same pattern in half the time with twice the quality.
How Materials Influence Buoyancy, Movement, and Realism
Smart material choices are the fastest path to controlling how your fly rides in the water column, how it moves in current, and how fish perceive it. This is where understanding fly making at a deeper level pays direct dividends.
Buoyancy: Floating vs. Sinking
The battle between floating and sinking starts with material selection:
For floating flies:
- Elk and deer hair (hollow, air-trapping fibers)
- Foam (closed-cell, unsinkable)
- Stiff dry fly hackle (supports the fly on surface tension)
- CDC feathers (natural oils repel water)
For sinking flies:
- Soft, absorbent dubbing
- Marabou and rabbit (waterlog quickly)
- Lead wire wraps under the body
- Tungsten beads (roughly 10 times denser than lead)
- Brass beads (lighter sink rate than tungsten)
The same fly pattern tied with different materials fishes completely differently. A foam beetle floats all day; the same profile in dubbed body sinks slowly through the film.
Weight and Sink Rate
Controlling depth is critical for nymphs and streamers:
| Material | Relative Density | Best Use |
|---|---|---|
| Tungsten bead | Very high | Euro-nymphing, fast water, deep runs |
| Brass bead | Moderate | General nymphing, moderate currents |
| Lead wire | High | Wrapped under body for even weight distribution |
| Nickel bead | Moderate | Similar to brass, different appearance |
| Unweighted | Neutral | Stillwater, slow swing, film presentations |
For trout fishing in swift currents, additional weight is essential to reach fish-holding zones. A size 14 nymph with a 3mm tungsten bead sinks faster than the same pattern with brass, getting into the strike zone before the drift ends.
Movement: The Life in Your Fly
Materials that move catch fish. Static flies often get ignored:
- Marabou: Breathes and pulses with minimal water movement
- Rabbit strips: Undulate seductively, triggering predatory instincts
- Soft hackle fibers: Collapse and flare with current changes
- Rubber legs: Kick and wave, adding life to nymphs and streamers
- CDC: Moves in the slightest current, ideal for emergers
A streamer with a rabbit strip tail that pulses on the pause will outfish a static bucktail pattern in most situations. Movement suggests life, and fish respond.
Realism vs. Attraction
When to match precisely versus when to trigger reactions:
Match the hatch when:
- Water is clear and slow
- Fish are visibly feeding on specific insects
- You’ve had refusals on general patterns
- Fishing heavily pressured water
Use attractor styles when:
- Water is stained or high
- Fish are aggressive (pre-spawn, feeding actively)
- Prospecting unknown water
- Fishing streamers for reaction strikes
For more tips and quality gear, check out Fly Fishing Specialties.
One Material Change, Different Fly
Consider a caddis dry fly. Tied with:
- Elk hair wing: Floats high, visible, durable—classic dry fly fishing
- CDC wing: Sits lower in film, more delicate silhouette—better for picky fish
- Foam body with elk wing: Unsinkable hopper-style presentation—aggressive takes
The same basic fly design performs three different jobs depending on material choices. This is why experienced tiers keep multiple versions of core patterns in their boxes.
Planning Your Own Fly Lineup and Experimenting Confidently
Random pattern selection leads to cluttered boxes and wasted tying time. A personal strategy—tying what you actually fish on the waters you visit most—makes sense for both efficiency and effectiveness.
Build a River-to-Fly Plan
Start with your primary water:
- Identify your most-fished river, lake, or coastal flat
- List the top 6–10 effective local patterns by season
- Note hook sizes, colors, and any regional tweaks
- Prioritize tying these patterns first before exploring other options
If you fish a tailwater 20 times a year and visit a freestone twice, tie tailwater patterns first. Your limited tying time should serve your actual fishing.
Gather Local Intelligence
Don’t reinvent the wheel. Talk to:
- Local fly shop staff (they know what’s selling and catching)
- Guides working your target waters
- Experienced tiers in local clubs or online forums
- Other flies successful anglers are using
Ask specific questions: “What size Pheasant Tail works best here in October?” or “Do you add flash to your caddis emergers?” Small regional tweaks often make the difference between catching fish and watching others catch fish.
Keep a Simple Tying Log
A notebook or spreadsheet tracking your flies and their performance accelerates improvement:
| Date | Water | Pattern | Hook Size | Fish Response | Adjustments |
|---|---|---|---|---|---|
| 4/15 | Home Creek | BWO nymph | 18 | 3 fish, 2 refusals | Try slimmer body |
| 4/22 | Home Creek | BWO nymph v2 | 18 | 6 fish, no refusals | Keep this recipe |
This log turns random experimentation into systematic refinement.
Guided Creativity
Experimentation should be guided by observation, not random. Try:
- Altering tail length based on natural insect proportions you’ve observed
- Adding or removing flash based on water clarity
- Changing bead color (silver vs. copper vs. black) to test fish preferences
- Combining features from two patterns that each catch fish
Then test systematically. Fish your new variation alongside a proven pattern. If it outperforms, you’ve learned something. If it fails, that’s information too.
The Fun of Personal Patterns
Once you’re busy tying proven patterns well, creating your own variations becomes one of the most rewarding aspects of fly making. Maybe you add a hot spot collar to a Pheasant Tail. Maybe you tie a woolly bugger variant with a different color tail. These personal touches—tested on your home water over multiple trips—eventually produce flies that work better for you than anything you could buy.
How Fly Making Deepens Your Fishing and Connection to Water
There’s a qualitative difference between catching a fish on a fly you bought and catching one on a fly you made. The latter feels earned in a way that’s hard to articulate until you experience it. That simple fly you tied at your bench, tested your theory with, and finally fooled a fish with—it represents a complete loop from observation to creation to success.
Practical Entomology
Fly making pushes you toward understanding insects without requiring a biology degree:
- You learn to distinguish mayflies from caddis from stoneflies at a glance
- You start noticing nymph cases on rocks and correlating them to adult emergences
- You recognize that the bugs you see flying around aren’t always what fish are eating—subsurface stages often matter more
- You understand why a size 18 matters when size 16 gets refused
This practical entomology directly improves your fishing. When you know a Pale Morning Dun hatch typically produces nymphs in the morning, emergers at midday, and duns in the afternoon, you can plan your fly selection accordingly.
Reading Water Through a Tier’s Eyes
Understanding how flies behave in water changes how you read rivers and lakes:
- You consider where nymphs drift and accumulate
- You notice the seams where emergers hang before breaking through the film
- You identify the structure where baitfish hold and predators ambush
- You see the water as habitat, not just scenery
This perspective makes you a better angler regardless of the pattern you’re fishing.
The Off-Season Investment
Winter evenings at the vise serve a purpose beyond passing time:
- Review notes from the past season’s successes and failures
- Tie flies for specific hatches and conditions you anticipate
- Experiment with new patterns and techniques without pressure
- Build fully stocked boxes before spring arrives
Anglers who tie through winter start the new season prepared. Those who don’t often find themselves buying rushed replacements at the first hatch.
Long-Term Rewards
The benefits of fly making compound over years:
- Confidence: You trust your flies because you understand their design
- Problem-solving skills: When standard approaches fail, you create solutions
- Stewardship: Understanding aquatic insects fosters appreciation for healthy ecosystems
- Community: Sharing patterns and techniques connects you with other passionate anglers
The fly thing becomes more than a hobby—it becomes a lens through which you see and engage with moving water.
FAQ: Practical Questions About Fly Making
How much does it really cost to start fly making, and when does it pay off compared to buying flies?
A solid basic setup—decent vise, bobbin, scissors, hackle pliers, whip finisher, and materials for 3–4 trout patterns—runs $100–200. YouTube videos and online tutorials eliminate the need for expensive classes initially. The financial “payback” compared to buying flies (typically $2–4 each) comes after tying and fishing several dozen patterns. But the true return isn’t financial—it’s the customization, learning, and satisfaction that store-bought flies can’t provide. Many anglers find that a custom dozen tied for $5–10 in materials outperforms generic store options by significant margins.
How long does it take before my home-tied flies consistently catch fish?
Even rough beginner flies catch fish. Fish don’t grade your work—they respond to profile, size, and movement. Your first woolly bugger, however ugly, will take fish if presented properly. Most tiers see noticeable improvement in quality and consistency after 2–3 focused months of regular tying. The point where your flies feel truly professional—clean heads, correct proportions, durable construction—typically comes after a year or two of steady practice.
Can I teach myself fly making from videos, or do I need an in-person class?
Both approaches work. Online tutorials offer flexibility—you can pause, rewind, and tie at your own pace. Resources from skilled tiers demonstrate everything from basic woolly buggers to complex articulated streamers. However, in-person classes or local club meetings provide hands-on feedback that accelerates learning. An experienced tier watching you work can identify tension problems, proportion issues, and technique flaws that you might not notice on your own. The ideal path combines both: learn fundamentals from quality video content, then seek occasional in-person guidance to break through plateaus.
What is the single best starter pattern for learning core skills?
The woolly bugger remains the best first fly for most beginners. It teaches:
- Mounting and securing a tail (marabou)
- Wrapping a body (chenille)
- Palmering hackle up the shank
- Creating a clean head and whip finish
- Optional: adding weight with lead wire or a bead
It’s forgiving of imperfection, catches virtually every species that eats flies, and builds fundamental skills applicable to dozens of other patterns. The zebra midge is a strong second choice, teaching small hook handling, wire ribbing, thread bodies, and bead placement on patterns that actually produce during slow fishing periods.
How do I store and organize my materials and finished flies to avoid chaos?
Organization saves time and reduces frustration:
For materials:
- Small labeled boxes for hooks sorted by size and style
- Clear plastic bins or zip bags for feathers, dubbing, and synthetics
- A tackle-style organizer for beads, eyes, and small items
- Keep frequently used materials within arm’s reach of your vise
For finished flies:
- Organize fly boxes by season, water type, or category (dries, nymphs, streamers)
- Label boxes clearly so you grab the right one for each trip
- Avoid overstuffing—crowded boxes crush hackle and damage flies
A few minutes of organization after each tying session prevents the chaos that makes finding the right hook or locating your best BWO pattern impossible when you need it.
Fly making transforms you from a consumer of flies into a creator of solutions. Every pattern you tie represents accumulated knowledge—about insects, fish behavior, materials, and your home waters. Start with a simple fly, fish it with confidence, learn from its performance, and refine your next attempt. The vise becomes a workbench for translating observations into tangible results, and the satisfaction of catching fish on your own creation never fades. Pick up a bobbin, thread a hook, and start tying flies this week. The water is waiting.